This post contains affiliate links. As an Amazon Associate and affiliate partner, RadGarden earns from qualifying purchases. That doesn't change what we recommend, we only feature grow lights we'd actually use to start our own Zone 8A seedlings.
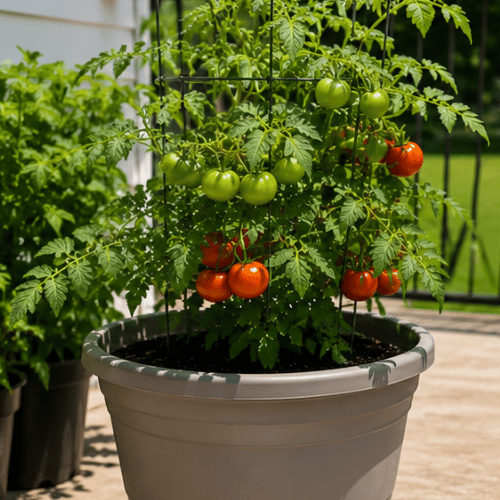
Growing tomatoes in pots for beginners almost always comes down to five predictable mistakes: a pot that is too small, no drainage, weak light, inconsistent watering, or no support at planting. None of that is bad luck, and none of it is complicated to fix once you know what to look for. You do not need a big yard or raised beds to grow real, ripe tomatoes, just a sunny patio, a balcony, or a small back step, and a plan for avoiding those five mistakes. Tomatoes in pots are a little less forgiving than tomatoes in the ground, because water, nutrients, and root space are all limited. Once you understand those limits, potted tomatoes become easy to manage and quick to reward you.
This guide is written with Zone 8A gardeners in mind (think Rock Hill, South Carolina, and similar Southeast summers), so the container, watering, and heat tips are built for real heat, not gentle weather.
Quick Answer: How to Grow Tomatoes in Pots
To grow tomatoes in pots, follow these steps:
- Use a large container, ideally 7 gallons or more, with drainage holes.
- Fill it with quality potting mix, not garden soil.
- Plant a stocky transplant deeply, burying most of the stem.
- Place the pot where it gets at least six hours of full sun.
- Water consistently, deeply enough that water drains from the bottom.
- Fertilize regularly with a slow-release or water-soluble tomato fertilizer.
- Add a cage or stake at planting so you do not damage roots later.
Can Beginners Grow Tomatoes in Pots?
Yes, and container tomatoes are a great first crop. They stay close to your door, they are easy to check on, and one healthy plant can hand you tomatoes for weeks. The honest part is that a pot is a smaller, faster world than a garden bed. The soil dries out sooner, the roots run out of room, and nutrients wash away every time you water. None of that is hard to handle. It just means you check on a potted tomato a little more often than one growing in the ground. If you can commit to a daily glance in summer, you can grow tomatoes in pots.
Why Growing Tomatoes in Pots Is Different
A tomato in the ground can push its roots down and sideways to find water and food. A tomato in a pot cannot. Growing tomatoes in containers changes the rules a little, because everything the plant needs has to fit inside that container, which affects care in three ways.
Containers dry out faster. Sun and wind pull moisture from the sides and the surface, and Iowa State Extension notes that container plants can dry quickly and may need daily watering in hot weather. Containers also heat up faster, especially dark plastic pots baking on a patio, which stresses roots. And containers run out of nutrients faster, because every watering carries a little fertilizer out the drainage holes. Keep those three things in mind and the rest of this guide will make sense.
Step 1: Choose the Right Tomato Variety
The most common beginner mistake happens before planting: picking a giant tomato variety that quickly outgrows its pot. Start with compact plants that were bred to stay manageable. Determinate, patio, dwarf, cherry, and other bush-type tomatoes are the friendliest for containers. Indeterminate tomatoes can absolutely grow in pots, but they need larger containers, stronger support, and more pruning, so they are better once you have one season under your belt.
Best beginner tomato types for pots
These types give you the best odds of success in your first container season.
| Type | Example varieties | Growth habit | Best use | Notes |
|---|---|---|---|---|
| Patio / bush | 'Patio', 'Better Bush', 'Bush Goliath' | Compact determinate | Small pots, balconies, patios | Stays short, needs little pruning |
| Dwarf / micro | 'Tiny Tim', 'Micro Tom' | Very compact | Windowsills and tight spaces | Small fruit, very easy to manage |
| Cherry / grape | 'Sungold', 'Sweet 100', 'Tumbling Tom' | Often indeterminate ('Tumbling Tom' is compact) | Steady picking and big flavor | Vigorous types need support and pruning |
| Determinate slicing / paste | 'Roma', 'Celebrity' | Bush or semi-bush | Cooking, sauce, sandwiches | Fruit ripens in a tighter window |
| Indeterminate (for large pots) | 'Early Girl', 'Better Boy' | Vining | Bigger harvests once you have practice | Needs 10+ gallons and strong support |
Variety labels vary a little by seed company, so check the tag or packet for the words determinate, bush, patio, or dwarf when you shop. If you are starting from seed rather than buying transplants, a good seed starting kit makes it much easier to raise stocky, healthy seedlings.
Determinate vs. indeterminate tomatoes
These two words show up on every tomato tag, and they matter more in a pot than anywhere else. According to NC State Extension, determinate tomatoes are compact bush types that usually grow to a set height and produce most of their fruit over a shorter period, which makes them well suited to containers. Indeterminate tomatoes keep growing and fruiting all season, getting taller and heavier, so they need bigger pots and a taller support system. For your first potted tomato, determinate or patio types keep things simple.
Step 2: Pick the Right Pot Size
This is the section that decides your whole season, so read it twice. Getting the tomato pot size right is the single biggest thing you can do for a potted tomato, and the rule is simple: give it a bigger pot than you think it needs. When people ask about the best pots for tomatoes, the honest answer is almost always a larger one. More soil means more root room, steadier moisture, and a buffer against the heat that cooks small pots on a Zone 8A afternoon.
Minimum pot size for tomatoes
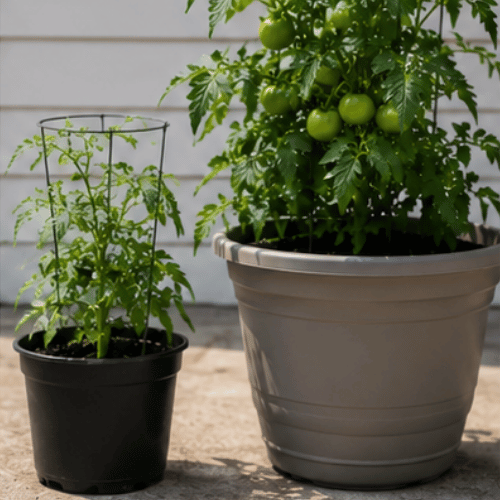
For compact and patio tomatoes, five gallons is the bare minimum. UNH Extension points out that a five-gallon bucket with drainage holes can work for a tomato plant, which makes it a budget-friendly starting point. Growing tomatoes in buckets is popular for exactly this reason. That said, five gallons dries out fast in summer, so treat it as a floor, not a goal.
Better pot size for bigger harvests
If you want more tomatoes and less daily watering, go larger. Penn State Extension recommends at least a 14-inch pot, which is roughly seven gallons, and notes that larger pots support larger plants and better production. For indeterminate varieties, aim for 10 gallons or more. Bigger really is better in containers.
| Tomato type | Minimum pot size | Better pot size | Support needed | Beginner difficulty |
|---|---|---|---|---|
| Dwarf / micro | 1 to 2 gallons | 3 gallons | Small cage or none | Easy |
| Patio / bush determinate | 5 gallons | 7 to 10 gallons | Cage | Easy |
| Cherry (compact) | 5 gallons | 10 gallons | Cage or stake | Easy to moderate |
| Determinate slicing / paste | 5 to 7 gallons | 10 gallons | Cage | Moderate |
| Indeterminate | 10 gallons | 15 to 20 gallons | Stake or trellis | Moderate to hard |
Grow bags vs. plastic pots vs. buckets
Any of these will grow a good tomato, so pick based on your space, budget, and how much watering you are willing to do.
| Container type | Pros | Cons | Best for |
|---|---|---|---|
| Fabric grow bags | Excellent drainage, air-prune roots, fold flat, affordable | Dry out faster, need more watering, floppy when moved full | Hot patios and gardeners who tend to overwater |
| Plastic nursery pots | Hold moisture longer, cheap, light, reusable | Can stay too wet without good drainage | Budget setups and steady waterers |
| 5-gallon buckets | Very cheap, sturdy, easy to find | Must drill drainage holes, small root space, heat up in sun | First-time growers on a tight budget |
| Glazed ceramic / large planters | Attractive, heavy and stable, insulate roots | Expensive, very heavy, some lack drainage | Permanent patio spots |

- Thickened Nonwoven Fabric: Crafted from 300G thickened breathable nonwoven fabric, these grow bags for plants provide moderate permeability for root respiration; BPA-free material ensures food safety for organic vegetables
- Superior Drainage Performance: These fabric pots prevent excess water retention while allowing proper airflow; Promotes air pruning to stop root circling and encourages vigorous root ball development
- Reinforced X-Shaped Stitching: Heavy-duty handles with cross-stitched reinforcement make these plant grow bags strong enough to hold fully loaded soil; Prevents tearing during frequent moving and repositioning
- Enhanced Air Pruning Effect: Breathable structure of these aeration pots improves oxygen circulation; Prevents root swirling and builds a stronger, more fibrous root system
- Heavy Duty Gardening Solution: Durable garden planting bags designed for multi-season use; Washable and foldable for easy storage; Each 20 gallon grow bag measures 20.5" diameter × 14.5" height, ideal for growing deep-rooted plants, multiple vegetable plants in one bag, or larger fruit trees and shrubs

Step 3: Make Sure the Pot Has Drainage
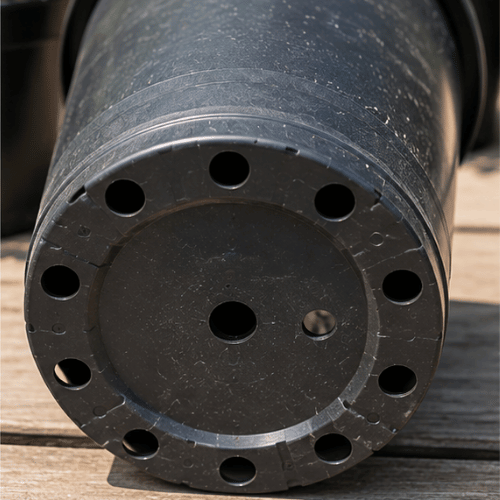
Drainage holes are non-negotiable. Without them, water pools at the bottom, roots sit in soggy soil, and your plant slowly drowns and rots. Every container you use needs holes in the base, and a bucket you buy without them needs a few drilled in yourself. Skip sealed decorative pots unless you use them as an outer cachepot with a well-drained grow pot tucked inside. Setting the pot on a riser or caddy also helps water escape and keeps the base from sitting in a puddle on your patio.

- Perfect Plant Stand:Perfect plant risers for pots indoor will give your plant the lift to save the surface underneath.Circular mesh structure improves drainage,prevents plant rot from your potted plants by allowing air flow beneath the plant and the excess water to drain,then keep potted plant healthy.
- Protect Surface:Planter holder can as floor plant protector can be widely used to placed on table or floor in any room.Elevated your pot off the floor deck or patio,then protect your floors from dirt, rust, stains and scratches.
- Material:This plant stand is made of high quality plastic,durable and heavy duty.With black color,suitable for indoors and outdoors use!Can used with various scenes,also put fruit pots, wine glasses and other daily necessities for home decoration.
- Size:Surface savers for potted plants measures in 12 inches in diameter,circular mesh structure,this design makes the planter accept the stress uniformly,then makes flower plant pot stands more stable,safe and reliable.
- Use in Many Place:The deck floor protector designed in lovely appearance,you can put it in office, parlor, balcony, courtyard, garden.It is suitable for flower pots of various shapes,you can move the plant easily into the sunlight indoor, or into the yard when rain was expected,protect your plants from harm in time.
Step 4: Use Potting Mix, Not Garden Soil
Reach for a bag of quality potting mix, and leave the garden soil in the yard. Native soil, especially the heavy clay common across the Southeast, compacts hard inside a pot, holds too much water, and chokes roots. Potting mix is lightweight and drains well, which is exactly what container tomatoes need. If you also grow in beds, the same drainage logic explains why we recommend a specific blend in our guide to the best soil for raised garden beds, but for pots, stick with a bagged potting mix.
Shop potting mixStep 5: Plant Tomatoes Deeply
Tomatoes have a trick most vegetables do not: they grow new roots along any part of the stem that is buried. Clemson's Home and Garden Information Center recommends planting transplants deeply enough to expose only two or three sets of true leaves. Pinch off the lower leaves, set the plant deep in the pot, and cover the bare stem with mix. Those buried roots build a stronger, more drought-resistant plant, which is a real advantage in a container that dries out quickly.
Step 6: Put the Pot in Full Sun
Tomatoes are sun lovers, and shade is a common reason beginner plants grow leggy and set little fruit. Clemson notes that tomatoes need at least six hours of full sun. Aim for six hours minimum, and eight or more when you can manage it. One advantage of pots is that they move, so if part of your patio gets better light, roll the container there. If you are trying to raise seedlings indoors before spring and your windows are dim, a good LED grow light keeps young plants stocky until it is warm enough to move them outside.
Step 7: Water Consistently
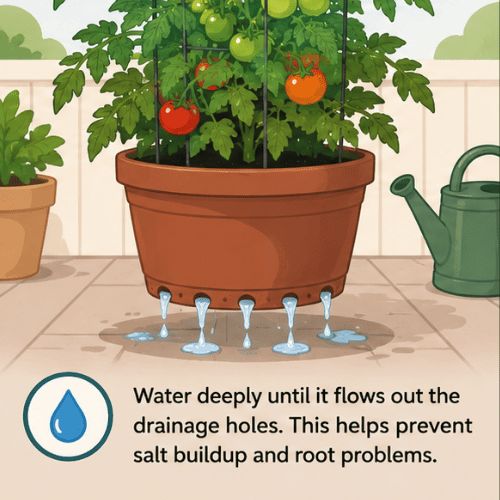
Watering is the make-or-break skill for container tomatoes, and consistency matters more than volume. When you water, water deeply, until it runs out of the drainage holes. Iowa State Extension advises watering enough to reach the bottom of the container and letting the excess drain. Shallow sips that only wet the top inch leave the deeper roots thirsty. A watering wand or a long-necked can makes it easy to soak the mix without blasting the leaves, and a well-made garden hose helps too, which is why we compared several in our roundup of the best garden hoses.
How often to water tomatoes in pots
In a Zone 8A summer, plan to check your pots daily. Clemson notes that container tomatoes may need daily watering during peak summer heat, and small or dark pots can even need it twice a day in a heat wave. The soil, not the calendar, is your guide: push a finger an inch into the mix, and if it feels dry, water. In spring and fall you will water less often, but the daily check keeps you from getting surprised.
Signs you are underwatering
Watch for wilting during the hottest part of the day that does not bounce back by evening, dry mix that pulls away from the sides of the pot, dropping flowers, and fruit that cracks after you finally soak it. If you see these, water more deeply and consider a larger pot or a layer of mulch to hold moisture.
Signs you are overwatering
Overwatering looks different: constantly soggy mix, yellowing leaves, a sour or stalled-looking plant, and little flies (fungus gnats) rising from the surface. If the soil never dries out, ease off, water only when the top inch is dry, and double-check that your drainage holes are open.
| Symptom | Likely cause | What to do |
|---|---|---|
| Midday wilting that recovers by evening | Normal heat stress in summer | Check soil morning and evening, water deeply if dry |
| Wilting with dry, pulling-away mix | Underwatering | Water until it drains from the bottom, add mulch or size up the pot |
| Wilting with soggy mix | Overwatering or blocked drainage | Let the mix dry slightly, confirm drainage holes are clear |
| Yellow lower leaves, wet soil | Overwatering | Reduce frequency, water only when the top inch is dry |
| Dark, sunken spots on fruit bottoms | Inconsistent watering affecting calcium uptake | Keep watering steady, mulch the surface |
| Cracked or split fruit | Heavy watering after a dry spell | Water consistently, avoid feast-or-famine cycles |

- 【Instant & Accurate Moisture Reading, No More Guesswork】 This plant moisture meter gives precise soil moisture readings in seconds! The responsive pointer instantly tells you if soil is dry, moist, or wet. It helps avoid overwatering & root rot, letting you water plants like a pro with confidence
- 【3 Simple Steps to Use】 Using this plant water meter is easy! ① Remove probe protector. ② Insert probe near roots, ensuring full soil contact till pointer swings ③ Read the moisture level. If some spots are wet and others dry, that's uneven watering—water evenly across the topsoil
- 【Clear, Easy - to - Read Dial】 This soil moisture sensor has a dial with color - coded zones (red=DRY, green=MOIST, blue=WET) & 10 scales. You can read moisture at a glance. No complex settings or learning needed, great for all gardeners
- 【2-Pack Value & Indoor Outdoor Use】 Monitor two plants at once with these moisture meters for plants. The 7.6-inch probe reaches deep roots, ideal for indoor & outdoor plants. A watering guide is printed on the box. NOTE: 2 meters are packed together inside 1 box — take everything out of the box to find BOTH meters. SOIL USE ONLY – NOT for water/liquid testing
- 【Root - Friendly Single Probe & Battery - Free】 Unlike bulkier double-probe designs, this single probe easily penetrates soil with minimal root disturbance and won't pull out much soil. No batteries required, always ready to use. Just remove and wipe clean after each test to extend its lifespan
Step 8: Fertilize Potted Tomatoes
Because nutrients wash out of pots every time you water, potted tomatoes need feeding more than in-ground plants do. Clemson recommends a timed-release balanced fertilizer at planting, or a weekly water-soluble fertilizer applied according to the label directions. Either approach works. The goal is steady, light feeding rather than one heavy dose.
Best fertilizer approach for beginners
Keep it simple. Mix a slow-release tomato fertilizer into the pot at planting, then add a water-soluble feed every week or two once the plant starts flowering and fruiting, or sooner if growth stalls. Always follow the label rate, since more is not better in a small root zone.
Too much nitrogen warning
If your plant is lush and green but short on flowers, it is likely getting too much nitrogen, which pushes leaves at the expense of fruit. You do not need to memorize NPK ratios. Just ease off the feeding, pick a fertilizer labeled for tomatoes or vegetables, and let the plant shift its energy toward setting fruit.
| Timing | Product type | What to watch for |
|---|---|---|
| At planting | Slow or timed-release balanced fertilizer | Follow the label rate, keep it off the stem |
| Every 1 to 2 weeks once fruiting starts | Water-soluble tomato fertilizer | Use only if growth stalls or fruiting is heavy |
| All season | Consistent moisture plus light feeding | Nutrients wash out fast, so little and often wins |
| Any time | Watch the plant, not the schedule | Lush leaves, few flowers means back off the nitrogen |

- For more nutritious and tasty vegetables
- Optimum levels of primary plant nutrients
- Contains no GMOs, chicken manure or sewage sludge
- Feeds for several months
- Made with 100% organic and natural ingredients
Step 9: Add Support at Planting
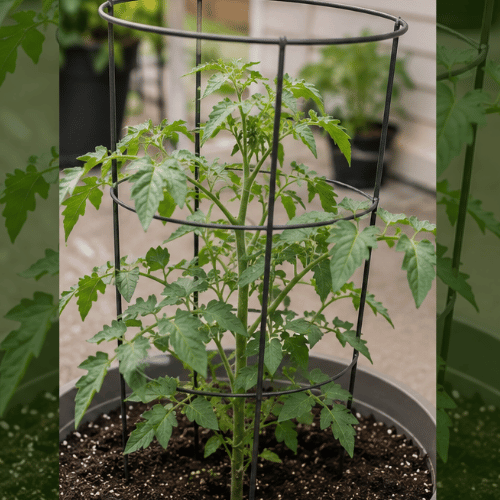
Set your cage or stake in place the day you plant, not weeks later. University of Minnesota Extension recommends staking or caging tomatoes at planting time, and this matters even more in pots. Adding support to an established container tomato means driving a stake through the root ball or wrestling a cage over a leafy plant, which damages roots and can tip the whole pot. Put support in first, and the plant grows into it.
Tomato cage, stake, or trellis?
Match the support to the plant. A sturdy cage is perfect for determinate and patio tomatoes, holding the bushy growth upright with no fuss. Indeterminate tomatoes grow tall and heavy, so they do better on a strong stake or a trellis system you tie them to as they climb. Some gardeners even run a DIY cattle panel trellis behind a row of large pots for tall, vining varieties. Whatever you choose, anchor it well so a summer storm does not topple a top-heavy plant.

- Package Includes: You will get 54 pcs plastic core stakes, 54 snap-on arms and 36 connecting pipes, 100 pcs 20 cm plant ties, it will provide ample space for plant growth, the green color makes them blend in better with the plants; This is a great choose for vegetables that are growing in the ground
- Premium Material: Plant stakes are made of high quality pp material, sturdy and long-lasting, it's super easy to put together and customize, anyone can do it in a couple of minutes, you can adjust to what height and length you need, and also can easily take apart them for storage afterwards the season is over
- Excellent Design: The ends of the plastic core stakes are pointy, so it helps bury them down the soil; The connecting pipes help you adjust the height of your garden stakes according to the height of the plant; The snap-on arms will help you form different shapes; we also provided plant tie for the plants to attach them as they climb
- No-tools Assemble: No tools needed; It came with plenty of interconnecting parts to ensure stability, you can splice these in triangles, squares, hexagons depending on the size of plants; Compared to traditional wire cages, it can easier add, remove or adjust the stake as needed as your plants grow or can be combined freely
- Wide Application: Tomato cage can provide support for your climb plants, flowers and vegetables, make them grow vertically, or use for a growing rose bush that needed to straighten, suitable for gardening enthusiasts; It's suitable for outdoor courtyards, indoor balconies, patio, outdoor rooftops, vegetable greenhouses
Step 10: Prune and Train the Plant
A little upkeep keeps a container tomato healthy and productive. Remove the lowest leaves once the plant is established, especially any that touch the soil, since they invite disease. Tie or clip the main stems to your support as the plant grows so nothing snaps under the weight of fruit. Good airflow between plants and leaves helps prevent the fungal problems that thrive in humid Zone 8A summers. If you are growing an indeterminate variety, you can pinch out some of the small shoots (suckers) that form where a leaf meets the stem to keep the plant open and manageable. Determinate and patio types need very little pruning, so do not overthink it.
Shop garden snipsGrowing Tomatoes in Pots in Zone 8A
Zone 8A gives container tomato growers a long, warm season, along with a few local challenges worth planning around. Here is how the year tends to shape up.
Spring container tomatoes
Spring is your main planting window. Set out transplants after your last frost, once both the air and the potting mix have warmed. University of Minnesota Extension advises transplanting outdoors after the danger of frost has passed and the soil has warmed. Cold mix stalls young tomatoes, so a little patience in early spring pays off with faster growth later.
Summer heat in pots
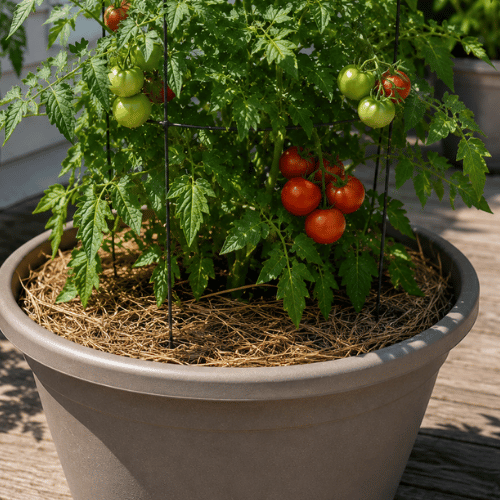
This is the Zone 8A test. Dark pots and small containers heat up fast in July, which stresses roots and can cause blossom drop. Fight back with larger containers, a layer of mulch on the surface to slow evaporation, and steady watering, sometimes twice a day in a heat wave. A little afternoon shade during the worst of the heat can also help the plant hold onto its flowers.
Fall tomato option
Because Zone 8A summers are long, a fall tomato crop is possible if you plant in mid to late summer for ripening before the first frost. Timing is tighter and you are working against lingering heat and pest pressure, so treat fall tomatoes as a fun second try once your spring plants have you feeling confident.
Not sure when to start your seeds indoors? Use the seed starting schedule generator to find the right dates for your area.
Common Problems With Tomatoes in Pots
Most container tomato trouble comes back to water, heat, or feeding. Here are the issues you are most likely to run into and how to read them.
Blossom end rot
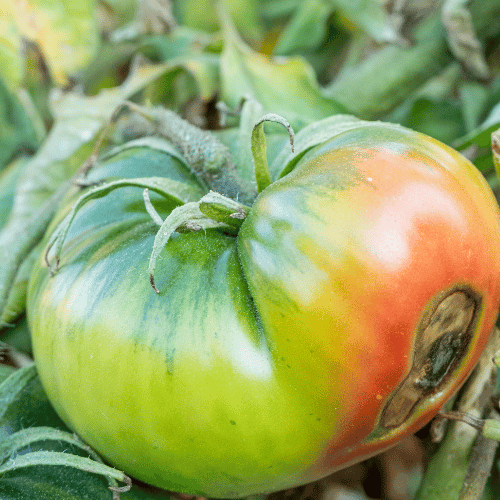
Blossom end rot shows up as a dark, sunken, leathery patch on the bottom of the fruit. It is usually tied to inconsistent watering, which interferes with how the plant moves calcium into the fruit, rather than a simple lack of calcium in the soil. The fix is steady moisture: water on a regular rhythm and mulch the surface to smooth out the wet-dry swings.
Cracking fruit
Cracks and splits happen when a plant gets a sudden flood of water after a dry stretch, and the fruit swells faster than its skin can stretch. The cure is the same as for blossom end rot: consistent watering rather than letting the pot dry out and then soaking it.
Yellow leaves
Yellowing has several possible causes, so look at the whole plant. Overwatering, low nutrients, and disease can all turn leaves yellow, and it is also normal for the oldest lower leaves to yellow and drop as the plant ages. Check your watering and feeding first, since those are the usual culprits in a pot.
Flowers but no tomatoes
When a plant blooms but the flowers fall without setting fruit, heat is often to blame. High temperatures, inconsistent watering, plant stress, and poor pollination can all cause blossom drop. In a Zone 8A summer, a bit of afternoon shade and steady water help the plant hold its flowers through the hottest stretch.
Tomato hornworms and pests
Container tomatoes are not immune to pests. Tomato hornworms, big green caterpillars that strip leaves fast, are the classic one, along with aphids and whiteflies. Inspect your plants regularly, especially the undersides of leaves and along the stems, since catching pests early makes them easy to handle. Handpicking hornworms works well on a single potted plant.
Shop tomato pest controlBeginner Container Tomato Setup
If you like a simple shopping list, here is everything a beginner needs to grow a healthy potted tomato, sorted by what is essential and what is nice to have.
| Item | Why it matters | Required or optional |
|---|---|---|
| Large pot (7+ gallons, with drainage) | Root room and steady moisture | Required |
| Quality potting mix | Drains well and resists compaction | Required |
| Stocky transplant of a compact variety | A faster, more reliable start | Required |
| Cage or stake, set at planting | Supports the plant without root damage | Required |
| Watering wand or long-neck can | Gentle, deep watering | Recommended |
| Slow-release tomato fertilizer | Steady feeding in a small root zone | Recommended |
| Mulch (straw, bark, or leaves) | Holds moisture through Zone 8A heat | Recommended |
| Moisture meter | Takes the guesswork out of watering | Optional |
| Plant clips and pruning snips | Easier training and cleaner cuts | Optional |
FAQs About Growing Tomatoes in Pots
What size pot for tomatoes should you use?
A 5-gallon container can work for compact and patio tomatoes, but larger containers, around 7 to 10 gallons or more, are usually better for water stability and production. Indeterminate varieties want 10 gallons or more.
Can tomatoes grow in 5-gallon buckets?
Yes. Growing tomatoes in 5-gallon buckets works well as long as the bucket has drainage holes and you choose a suitable compact variety. It is one of the most budget-friendly ways to start.
How often to water tomatoes in pots?
Check daily in hot weather, and water deeply until it drains from the bottom. Small or dark pots in peak summer heat may need water twice a day. Let the top inch of mix be your guide.
Do tomatoes need full sun in pots?
Yes. Clemson recommends at least six hours of full sun. Aim for six hours minimum, and eight or more when you can, for the best growth and fruit.
What is the best soil for tomatoes in pots?
Use a high-quality potting mix, not heavy garden soil. Potting mix drains well and stays loose, while native clay soil compacts and holds too much water in a container.
What is the best fertilizer for tomatoes in pots?
The best fertilizer for tomatoes in pots is a balanced slow-release fertilizer worked into the mix at planting, topped up with a water-soluble tomato fertilizer every week or two once fruit sets. Container tomatoes lose nutrients with each watering, so regular light feeding works better than one heavy dose. Skip high-nitrogen blends, which push leafy growth at the expense of fruit.
Can you grow indeterminate tomatoes in pots?
Yes, but they need larger containers, strong support such as a stake or trellis, more pruning, and consistent watering. Determinate and patio types are easier for a first season.
Why are my tomato leaves turning yellow in pots?
Common causes include overwatering, underwatering, low nutrients, natural aging of the lowest leaves, or disease. Check your watering and feeding routine first, since those are the usual issues in a pot.
Why are my tomato flowers falling off?
Heat, inconsistent watering, plant stress, and poor pollination can all cause blossom drop. In a hot Zone 8A summer, steady water and a little afternoon shade help the plant hold its flowers.
Can I grow tomatoes on a patio?
Yes. Patio tomatoes do well as long as the spot gets enough sun, at least six hours, and your pot has drainage. Growing tomatoes on a patio also lets you move pots into better light, which is a real advantage.
Start With One Big Pot and One Strong Plant
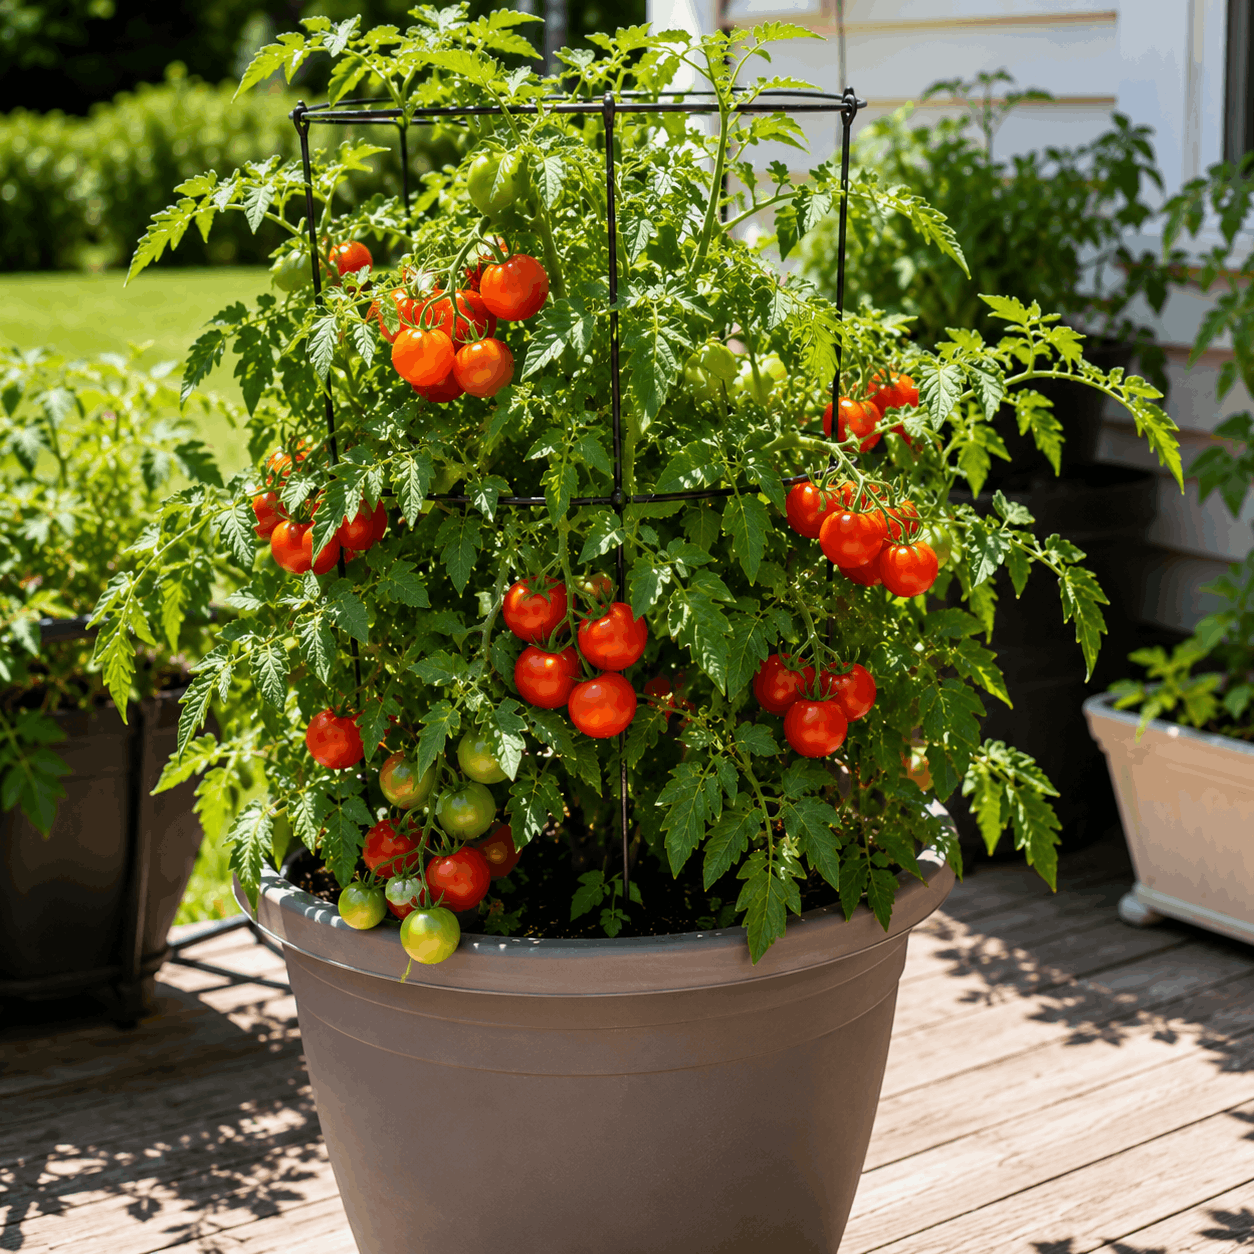
You do not need a perfect setup to grow great tomatoes in pots. You need one large container with drainage, a bag of quality potting mix, one healthy transplant of a compact variety, and a habit of checking the soil each day. Get that combination right for a single plant, learn how it drinks and grows through a Zone 8A season, and you will have all the confidence you need to add more pots and bigger varieties next year. That same close attention pays off with every crop you try next, whether you are timing a fall round of greens or learning when to harvest onions. Start simple, start now, and let that first ripe tomato do the convincing.